Commitment To Sparkle Motion: Sparkler Portraits and Light Painting
10 78 Share TweetTwice a year we have the ability to stock up on sticks that twinkle when we light them on fire. Sparklers have a color you can’t replicate. Here we will talk about how to use sparklers for lighting portraits and light painting. From common mistakes to best practices, let’s lock in your commitment to Sparkle Motion!

Twinkle, sputter, and fire drizzling glory from such small sticks. Sparklers were invented by Callinicos of Heliopolis in about AD 670. Callinicos, who was an architect, called the invention ‘Cherosiphon’ which was more like a small Roman candle. After so many years, these golden colors haven’t lost their luster.

I fell in love with images of sparklers in other photographs. I liked the sparks thin arcs as they flew away. I wondered what it would look like to do light painting with them.

I wondered what camera, film, and exposure time was needed to take some photos without additional light sources. So, like we all do, I experimented.

I started with light painting. This was in my first year of photography, so these experiments didn’t use a timer or any math. It was all done by feel. If anything, light painting with sparklers is very easy. There are just a few things you have to prep to make it work.
1. Sparklers – Easy, right? Nope. You have to pick the right sparklers so that they do what you expect. You want golden or silver color sparklers. Any other color won’t sparkle. They lie. They FLARE. Green, red, blue, etc. will burn bright and create a great deal of smoke. It doesn’t sparkle and shoot off sparks. It will only burn central and bright.
2. Timing – Most common sparklers (8" long) burn for 30 sec. That will be important for timing what you want to paint. Most light painting gigs, you just turn off the light source when you’re done. Just try snuffing out a sparkler before it wants to go.
3. Camera with Bulb mode – no long exposure capability is a buzz kill. Not only do you need Bulb mode, but it is even more helpful to have a way to lock the shutter open. The Diana has this ability as a standard feature. The LC-A+/LC-W, La Sardina, and Lubitel all have a threading for a cable release.
4. A partner – Someone to open and close the shutter for you. You already have to light the sparkler and draw, don’t make yourself have to run back and forth as well.

Light painting with Sparklers:
You’ll want 400 iso film for this project, if you use cameras with an f8 aperture and up. If using the LC-A+/LC-W you can use 100 iso because you have a lovely f2.8/F4.5 to work with. You’ll want to rehearse your shot once or twice to make sure your timing is right. Since you can’t turn off the sparkler for 30 sec. you will have to draw a continuous line or cover/block it with something in-between lines.

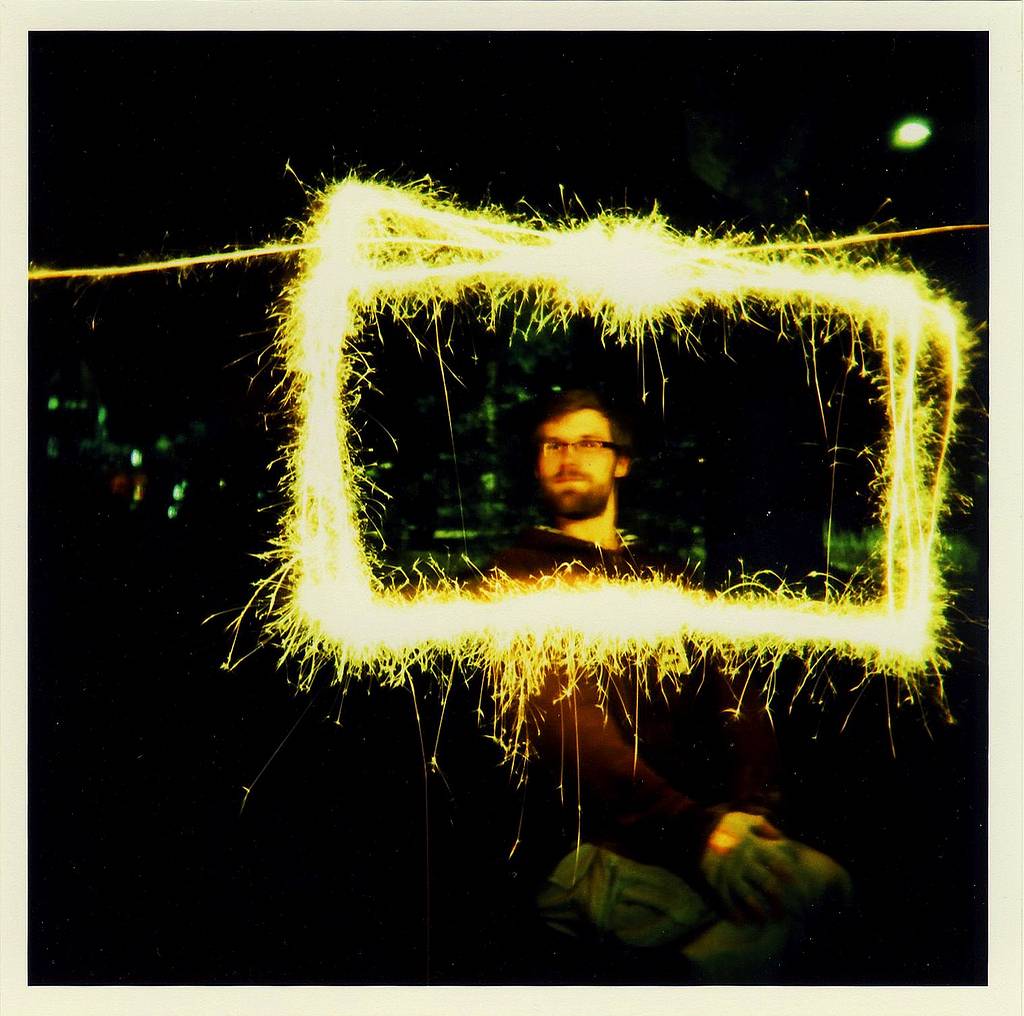
Once you have the timing down, you can light the sparkler and open the shutter. I used the sparklers to outline people and their poses. In this case, the sparkler will not have enough light, to illuminate the subject, because your light source is moving. I recommend an orange, yellow, or gold flash gel to match the sparkler color. You should pop the flash at the end of the light painting.
You can really create anything you want to around your friends or other subjects.


Some sparklers offer multiple colors on one stick. They have the same issue with flaring instead of sparkles, but they have one cool effect. I call it “Spangles”. It is where the sparkles jump off the stick and then pop. This can open up some new possibilities, like this.

Longer Sparklers are 1 1/2" to 2". They burn the same way, but burn for 1 1/2 min. You can use these to light a whole area. In this shot, I stuck them in the ground, close to my subjects, and lit them. They moved their arms but held still for about a min.

Now, you’ll have noticed that some of these shots have thin lines and others have thicker brighter lines. The thinner lines are done by drawing more quickly, while the thicker lines are created by drawing more slowly.

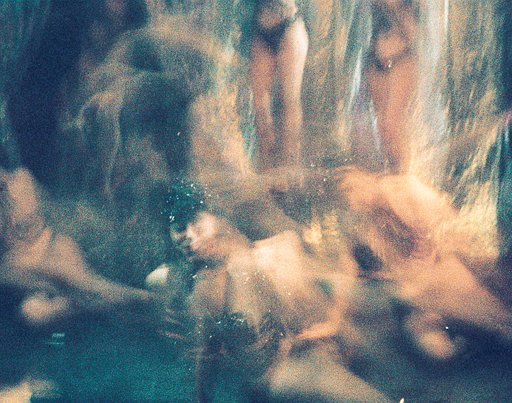
This shot has the outline drawn slowly around her head and faster in the waves above her. You can see the difference.
I have also used sparklers for light painting and then re-shot the roll. Here are some examples from the Sprocket Rocket:


Portraits:

Sparkler portraits are a different beast, all together. It requires a dark space, a subject that can stand still, and 2 sparklers per shot. You’ll have 30 sec to shoot, so you can usually squeeze in 3 pictures. Most of these images were done with a Petri Color 35 because it had a light meter built in. I have recently applied this to the LC-A+ and had equally good results.
The process and particulars -
1. You’ll need 2 sparklers, so you can evenly light your subject.
2. Stand about 3" – 4 1/2" away from your subject.
3. Have them hold the tips of the sparklers together, so you can light them at the same time.
4. Have them practice holding the sparklers the right distance from their face. The hands should be shoulder width apart and have the tips pointing away from the face at a slight angle. Too close and the face will be too lit and too far you get shadows
Too Close:

Too Far:

5. You have to emphasize, to your photo subject, the importance of staying still for the shot. The exposures never last longer than 3 sec, but eyes blinking or adjustment of smile will blur the shot.

If you are using an LC-A+, your exposure time will be about 3 sec, but you can trust the camera to tell you. The LC-W will take about 4 sec or so. La Sardina, Sprocket Rocket, Fisheye(2), Diana Mini will take about 6-8 sec, and the Diana will take about 10-12. You can see why I would prefer to work with the widest aperture, as it would limit the amount of time the subject must remain still.
Some examples from the Petri Color 35:


Examples from the LC-A+:


If you want to be daring, you can try it with only one sparkler. The exposure time will be about 2x as long. Make sure to center the sparkler, if you want the light to fall evenly on your subject.

There are still many more ways to play with sparklers, but this is a great place to start. Stock up on sparklers and have some fun. Stay safe and stay curious.

The Lomo LC-A+ is known worldwide for its amazing features: automatic exposure, extended ISO range, and multiple and long exposure capabilities. Get your own Lomo LC-A+ now!
เขียนโดย lomo-camkage เมื่อ 2012-07-02 ในหมวด #gear #คำแนะนำ #long-exposure #tutorial #light-painting #sparklers #analogue-photography #tipster #portraits #bulb-mode


10 ความคิดเห็น